
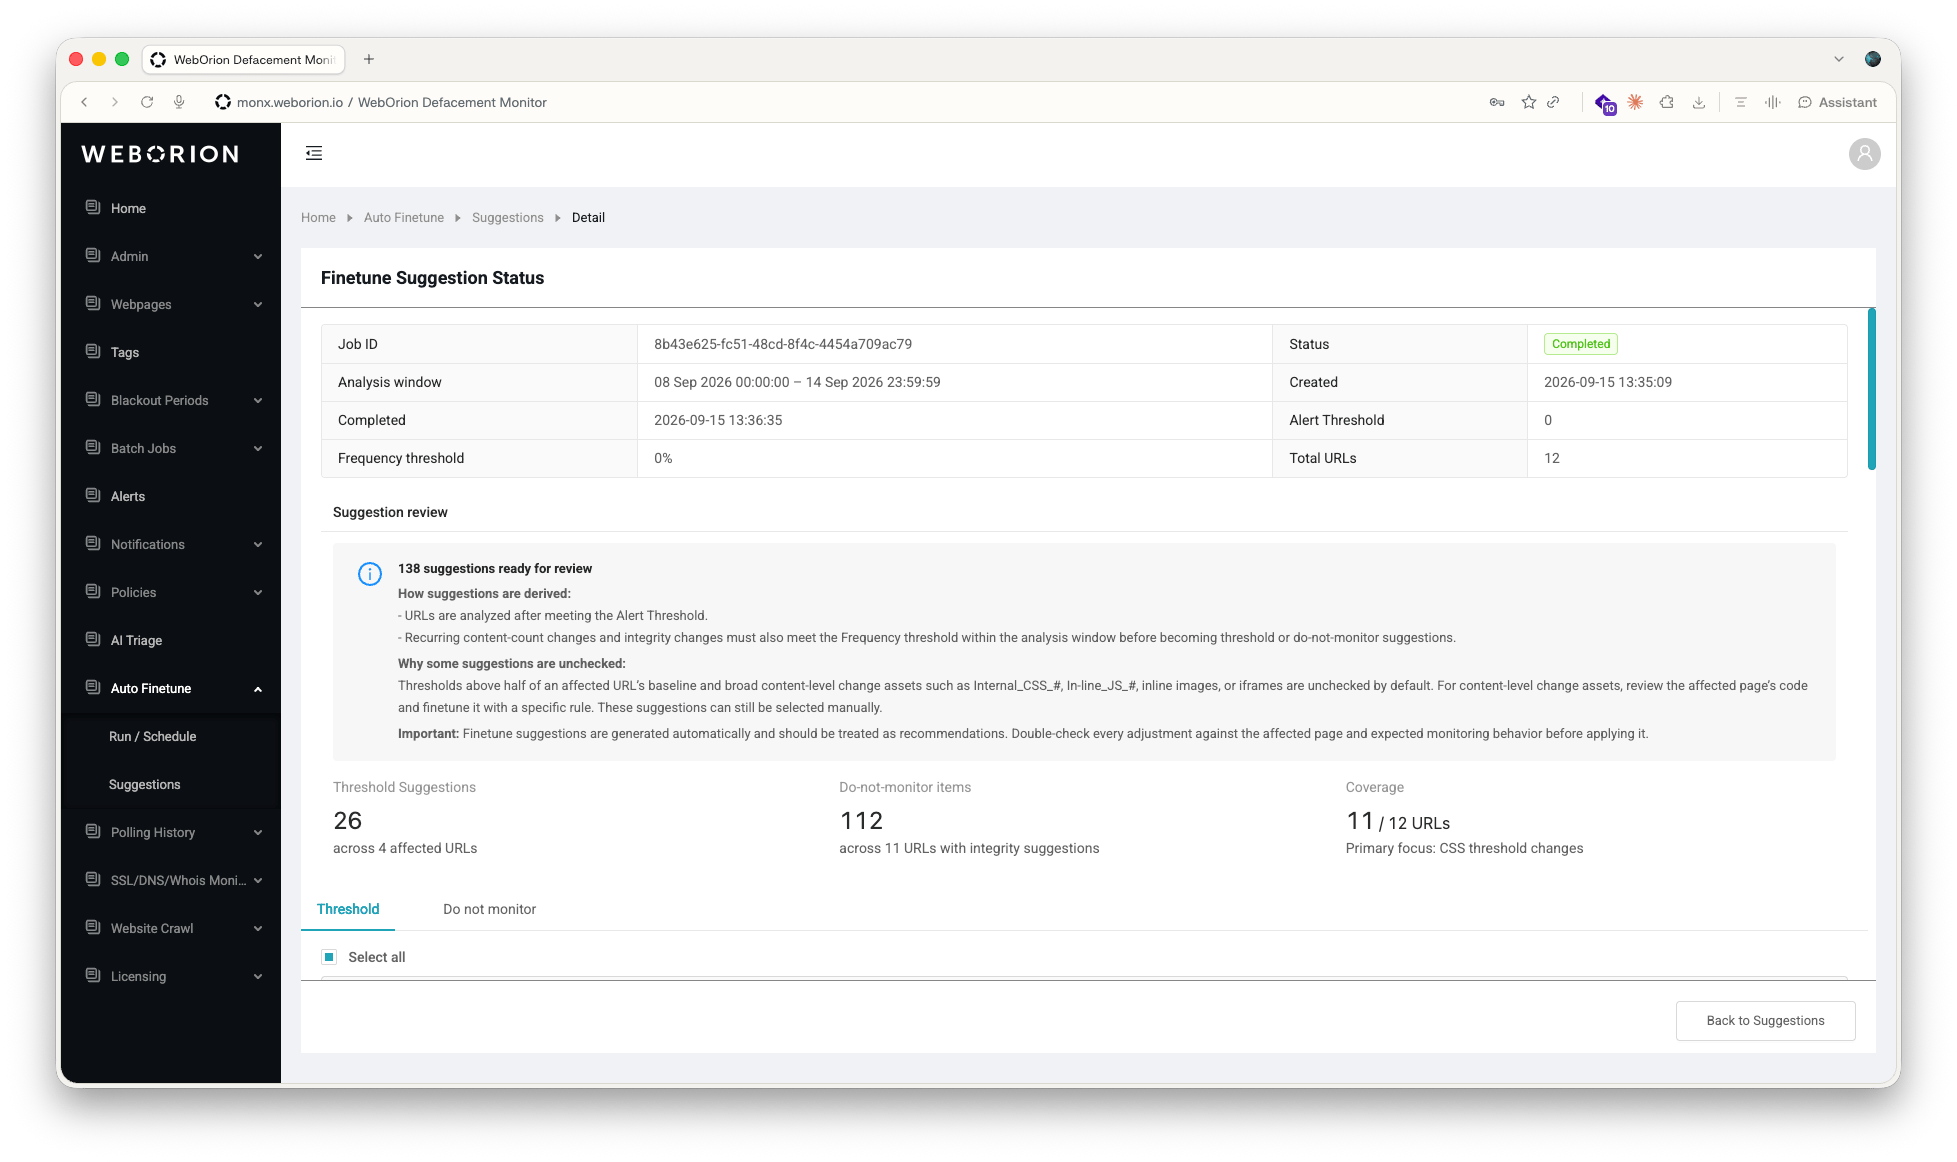
Auto Finetune works with the Content & Integrity Analytics engine. If you can’t open the Auto Finetune pages, reach out to Customer Support.
How suggestions are generated
- WebOrion counts the alerts raised for each webpage within the analysis window. Only webpages that raised at least as many alerts as the Alert Threshold are analysed.
- For each analysed webpage, WebOrion compares the changes detected across its alerts:
- Element counts — Href Links, Images, Javascripts, Cascading Style Sheets, Iframes, Divisions, Forms, and # of HTML Lines. The change amount that appears most often becomes the suggested threshold.
- Integrity elements — individual scripts, stylesheets, images, and links. Elements that changed in at least the Frequency threshold percentage of alerts become do-not-monitor rule suggestions.
- Suggestions are grouped by domain and by policy, so you can apply related changes together.
Run a one-time analysis
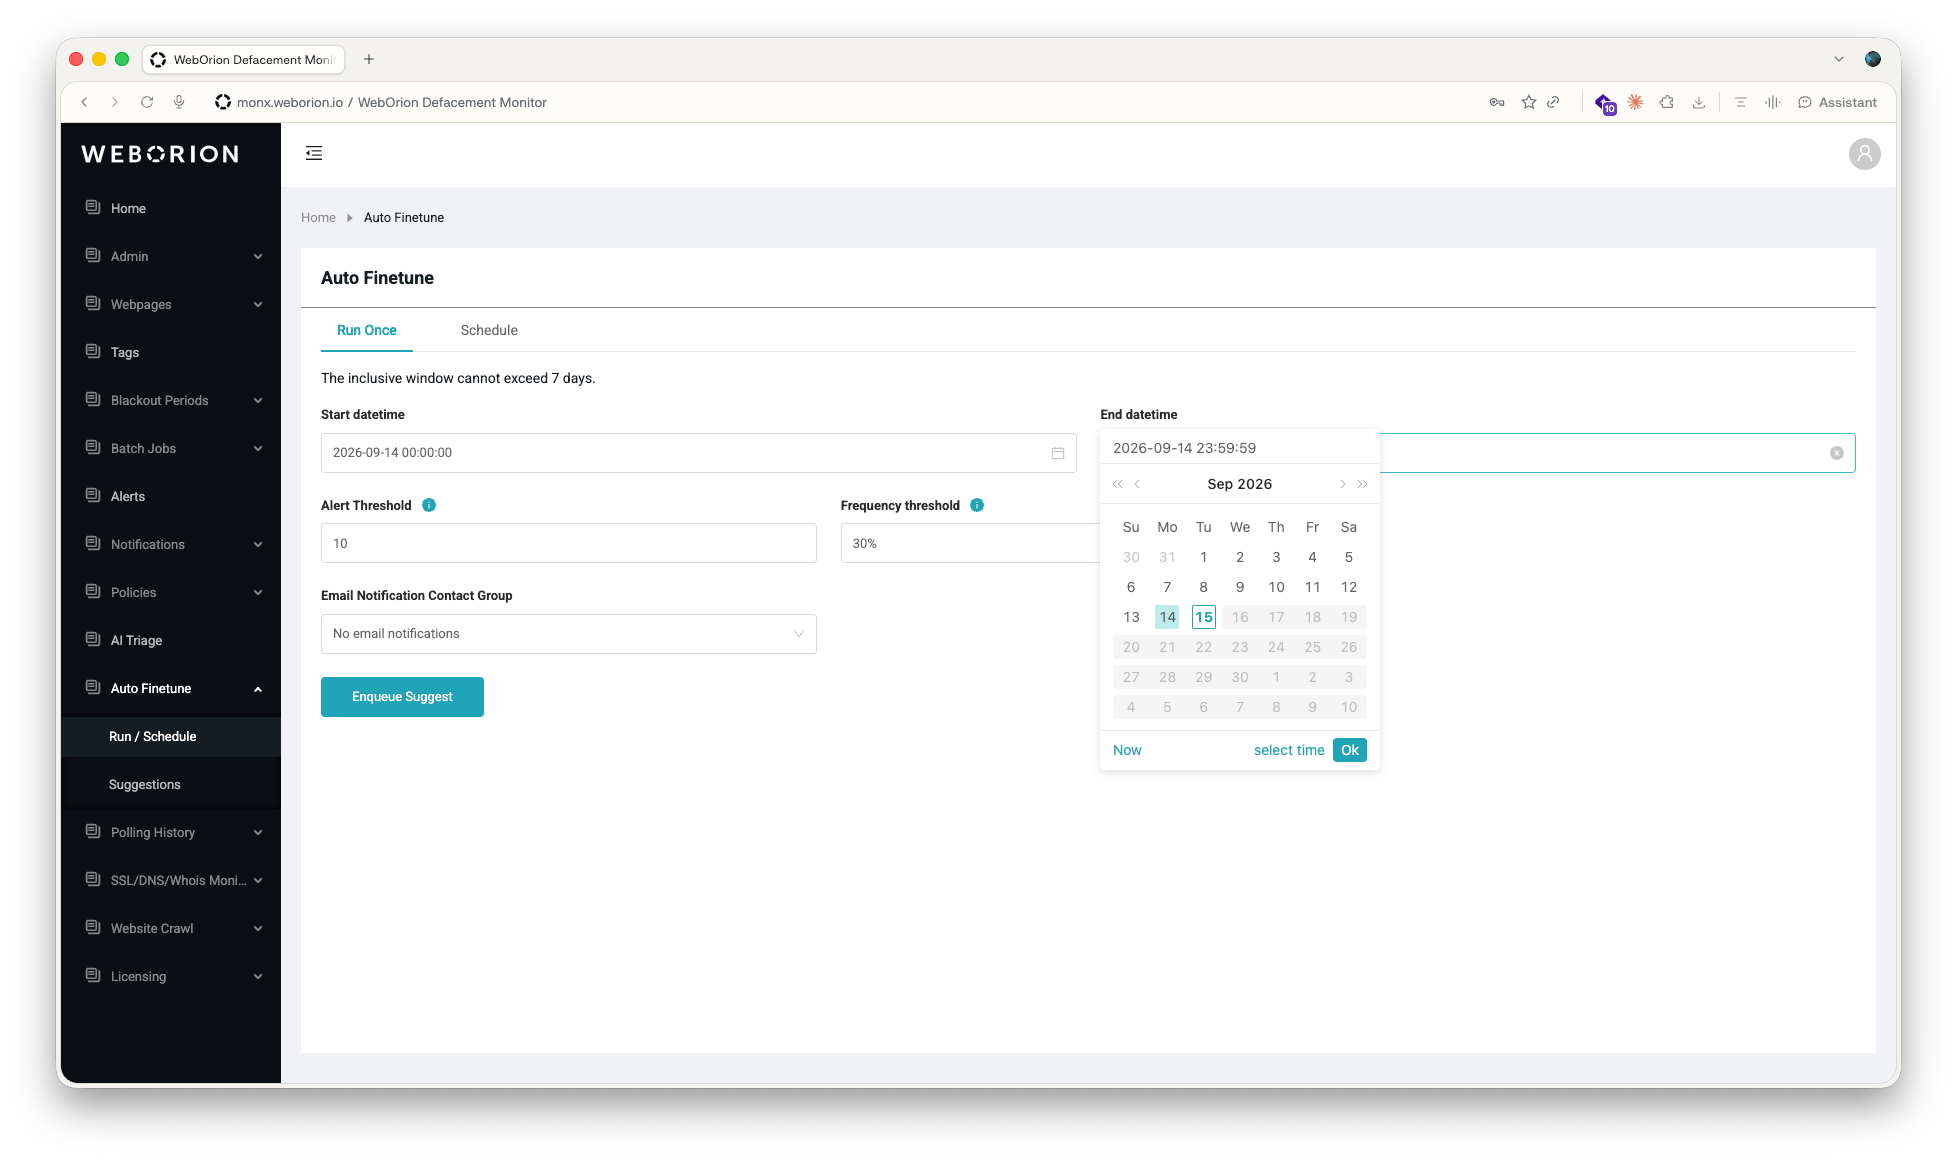
- Go to Auto Finetune → Run / Schedule. The Run Once tab is selected by default.
- Set the Start datetime and End datetime of the analysis window. The window defaults to the previous day, can span at most 7 days, and can’t end in the future.
- Adjust the Alert Threshold and Frequency threshold, or keep the defaults.
- Under Email Notification Contact Group, select the group to notify when the results are ready.
- Click Enqueue Suggest.
Schedule recurring analyses
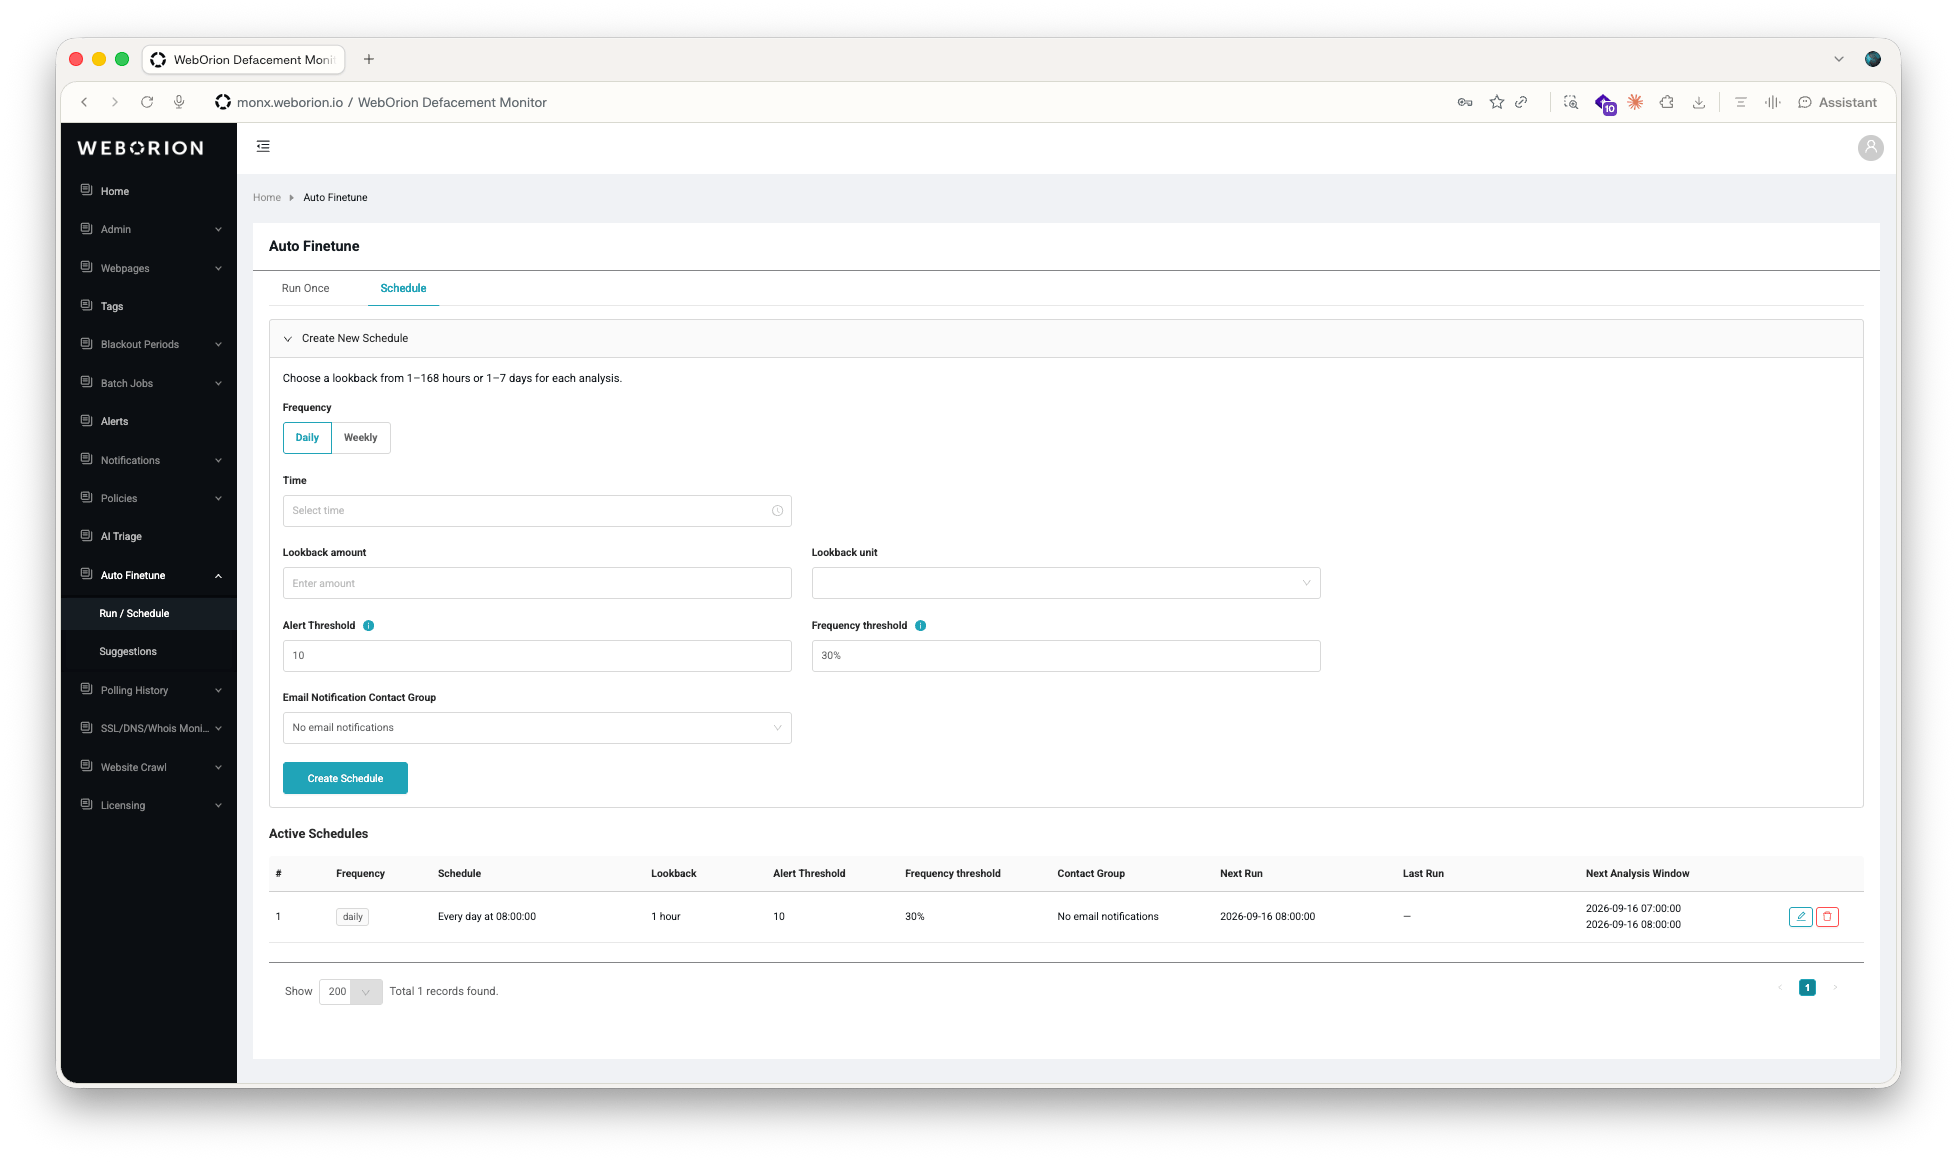
- Go to Auto Finetune → Run / Schedule and select the Schedule tab.
- Under Create New Schedule, select a Frequency: Daily or Weekly. For a weekly schedule, also select the Day of Week.
- Set the Time at which the analysis runs.
- Enter the Lookback amount and select the Lookback unit: from 1 to 168 hours, or from 1 to 7 days. Each run analyzes the period that ends at the run time and starts that far back. For example, a daily schedule with a lookback of 24 hours analyzes the previous 24 hours.
- Adjust the Alert Threshold, Frequency threshold, and Email Notification Contact Group.
- Click Create Schedule.
Review a suggestion report
Go to Auto Finetune → Suggestions to see every analysis run, one-time and scheduled, with its Job ID, Status, Analysis window, and Created and Completed times. You can search by job ID, filter by date range, and filter by status.
The list refreshes automatically while jobs are in progress. Click a Job ID, or click ⋮ → View Detail, to open the report.
To remove reports you no longer need, click ⋮ → Delete on a row, or select several rows and click Delete Selected. You can delete up to 50 reports at a time, and only reports with the Completed or Failed status. Deleting a report doesn’t undo changes you already applied from it.
Report summary
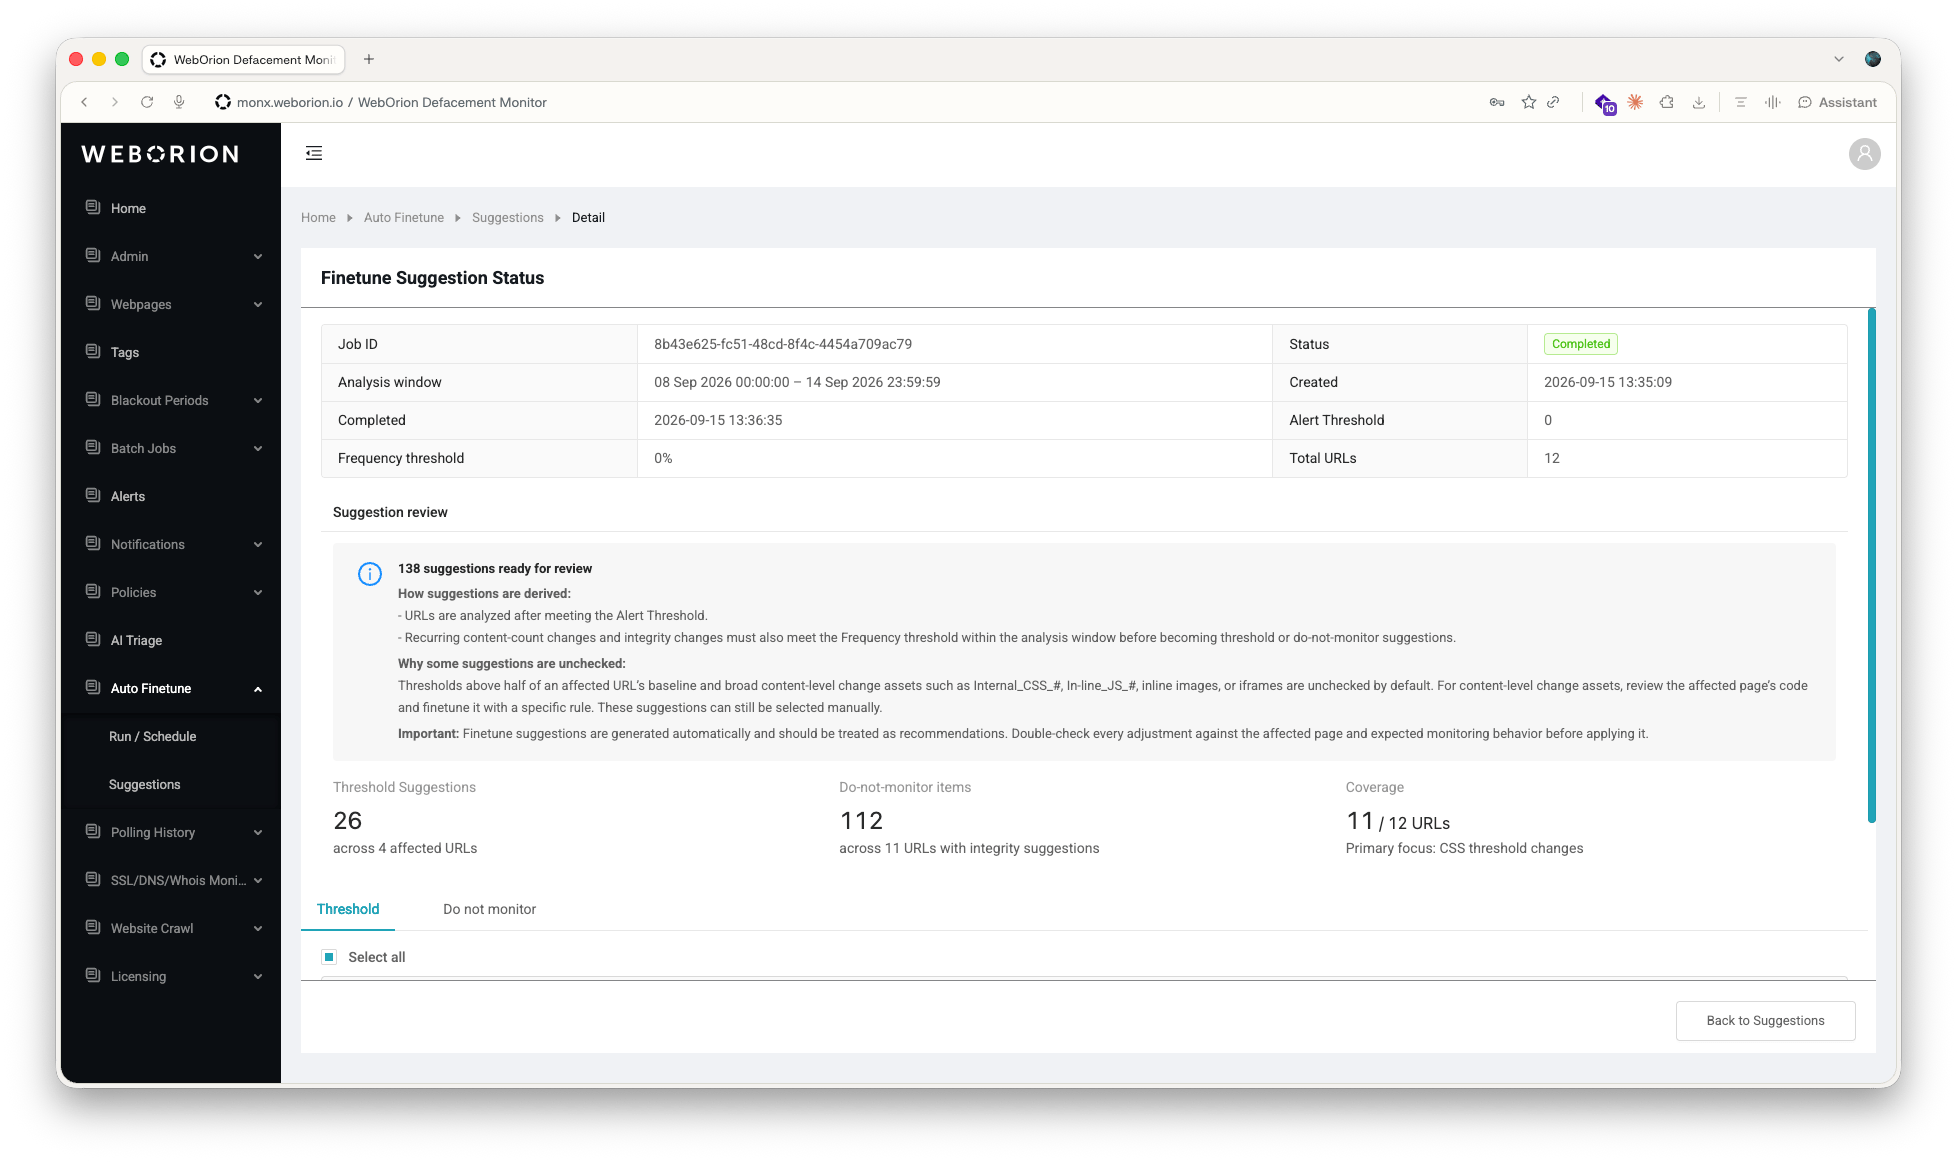
- Threshold Suggestions — the number of threshold changes suggested and the number of webpages they affect.
- Do-not-monitor items — the number of policy rules suggested and the number of webpages they cover.
- Coverage — how many of the analyzed webpages received at least one suggestion.
Why some suggestions start unchecked
Auto Finetune pre-selects the suggestions that are safe to apply as they are, and leaves the rest unchecked. You can still select an unchecked suggestion manually.Apply threshold suggestions
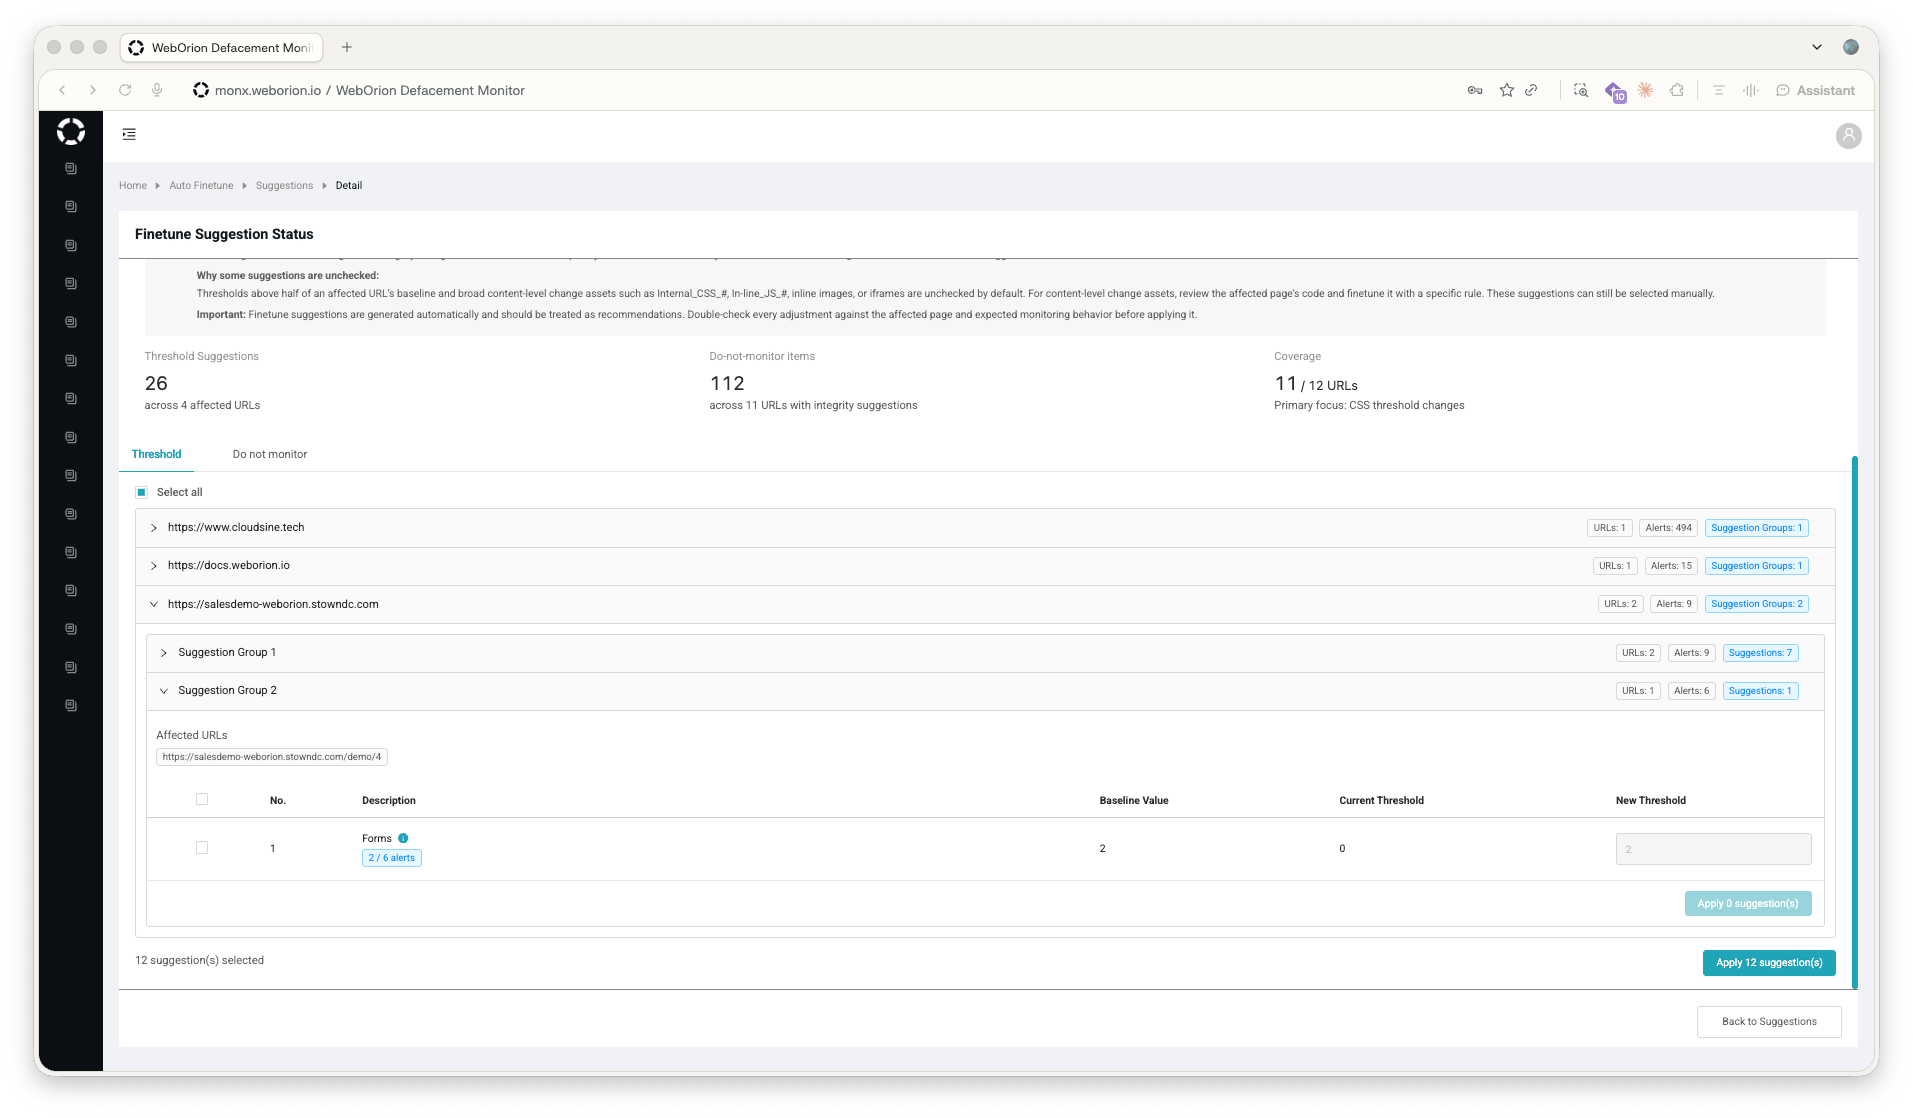
To apply threshold suggestions:
- Expand a domain, then expand a suggestion group.
- Check the rows you want to apply and uncheck the rest. Use Select all at the top of the tab to select every suggestion in the report.
- Optionally, change the New Threshold value of a row.
- Click Apply N suggestion(s) within the group to apply that group only, or click the same button at the bottom of the tab to apply every selected suggestion in the report.
- Click Apply to confirm.
Apply thresholds to related webpages
When a group has at least one selected suggestion, an Apply to related URLs panel appears below it. Use it to extend the selected values to other webpages as minimum thresholds:- Apply to domain applies the values to every webpage on the same domain. A leading
www.is ignored when matching. - Apply to tag applies the values to every webpage with the selected tag. If the affected webpages have several tags, choose one from the list first.
Apply do-not-monitor suggestions
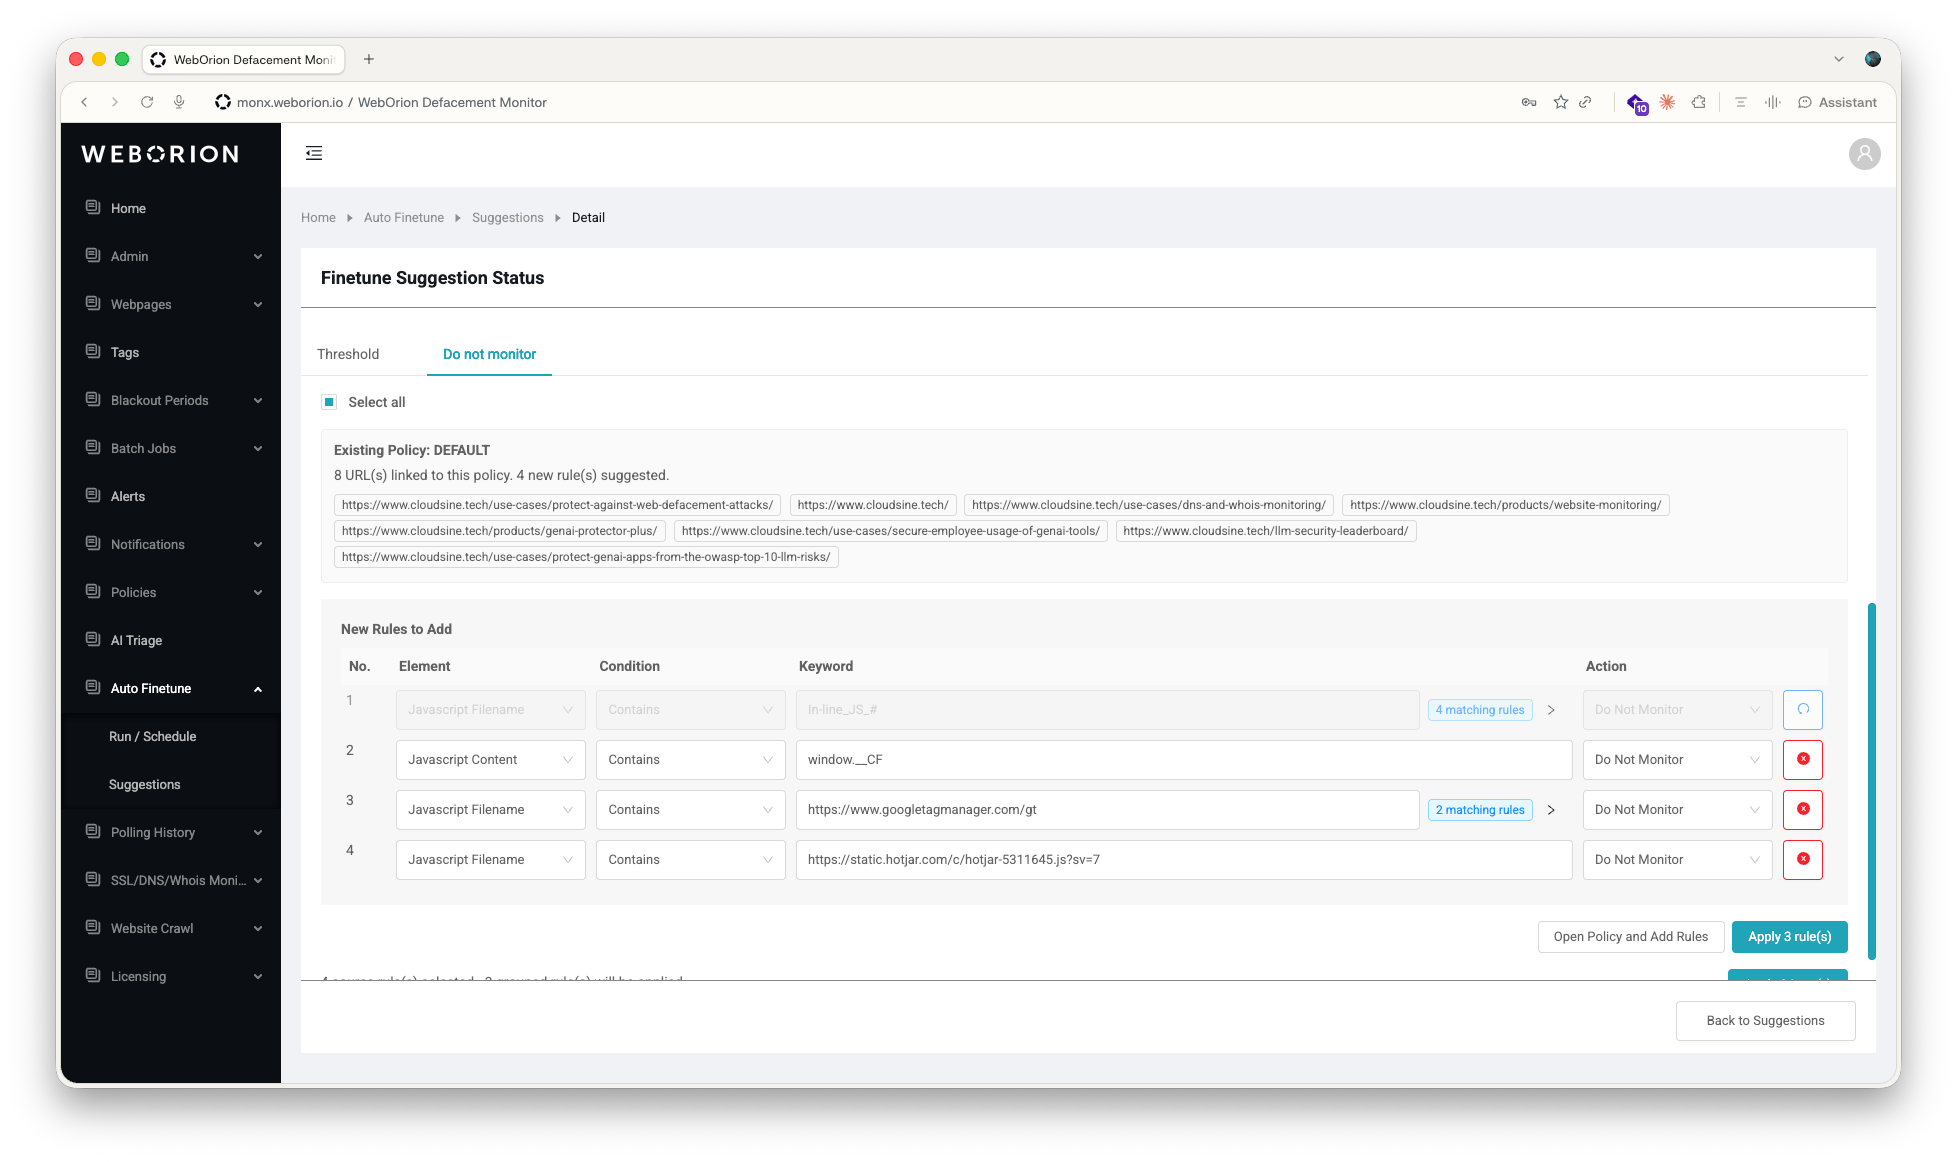
- Policy name (N) — webpages that already have a policy. Only rules that the policy doesn’t contain yet are listed, under New Rules to Add.
- New policy (N URLs) — webpages without a policy. The rules are listed under Rule List.
- Select the tab of the policy you want to update.
- Review the rules. Click the remove icon on a row to drop it from the selection, or the undo icon to restore it. Edit the Keyword where a more specific or more general match is appropriate. Use Select all at the top of the tab to select every rule in the report.
- Apply the rules:
- For an existing policy, click Apply N rule(s) to add the selected rules to the policy immediately, then click Apply to confirm. The policy’s existing rules, webpages, and settings are preserved. To review the policy before saving, click Open Policy and Add Rules instead: the policy editor opens in a new tab with the rules added, and you click Save there.
- For webpages without a policy, click Create Policy with Suggested Rules. The Add Policy page opens with the rules and the affected webpages pre-filled. Enter a policy name and click Save.
Finetune from a single alert
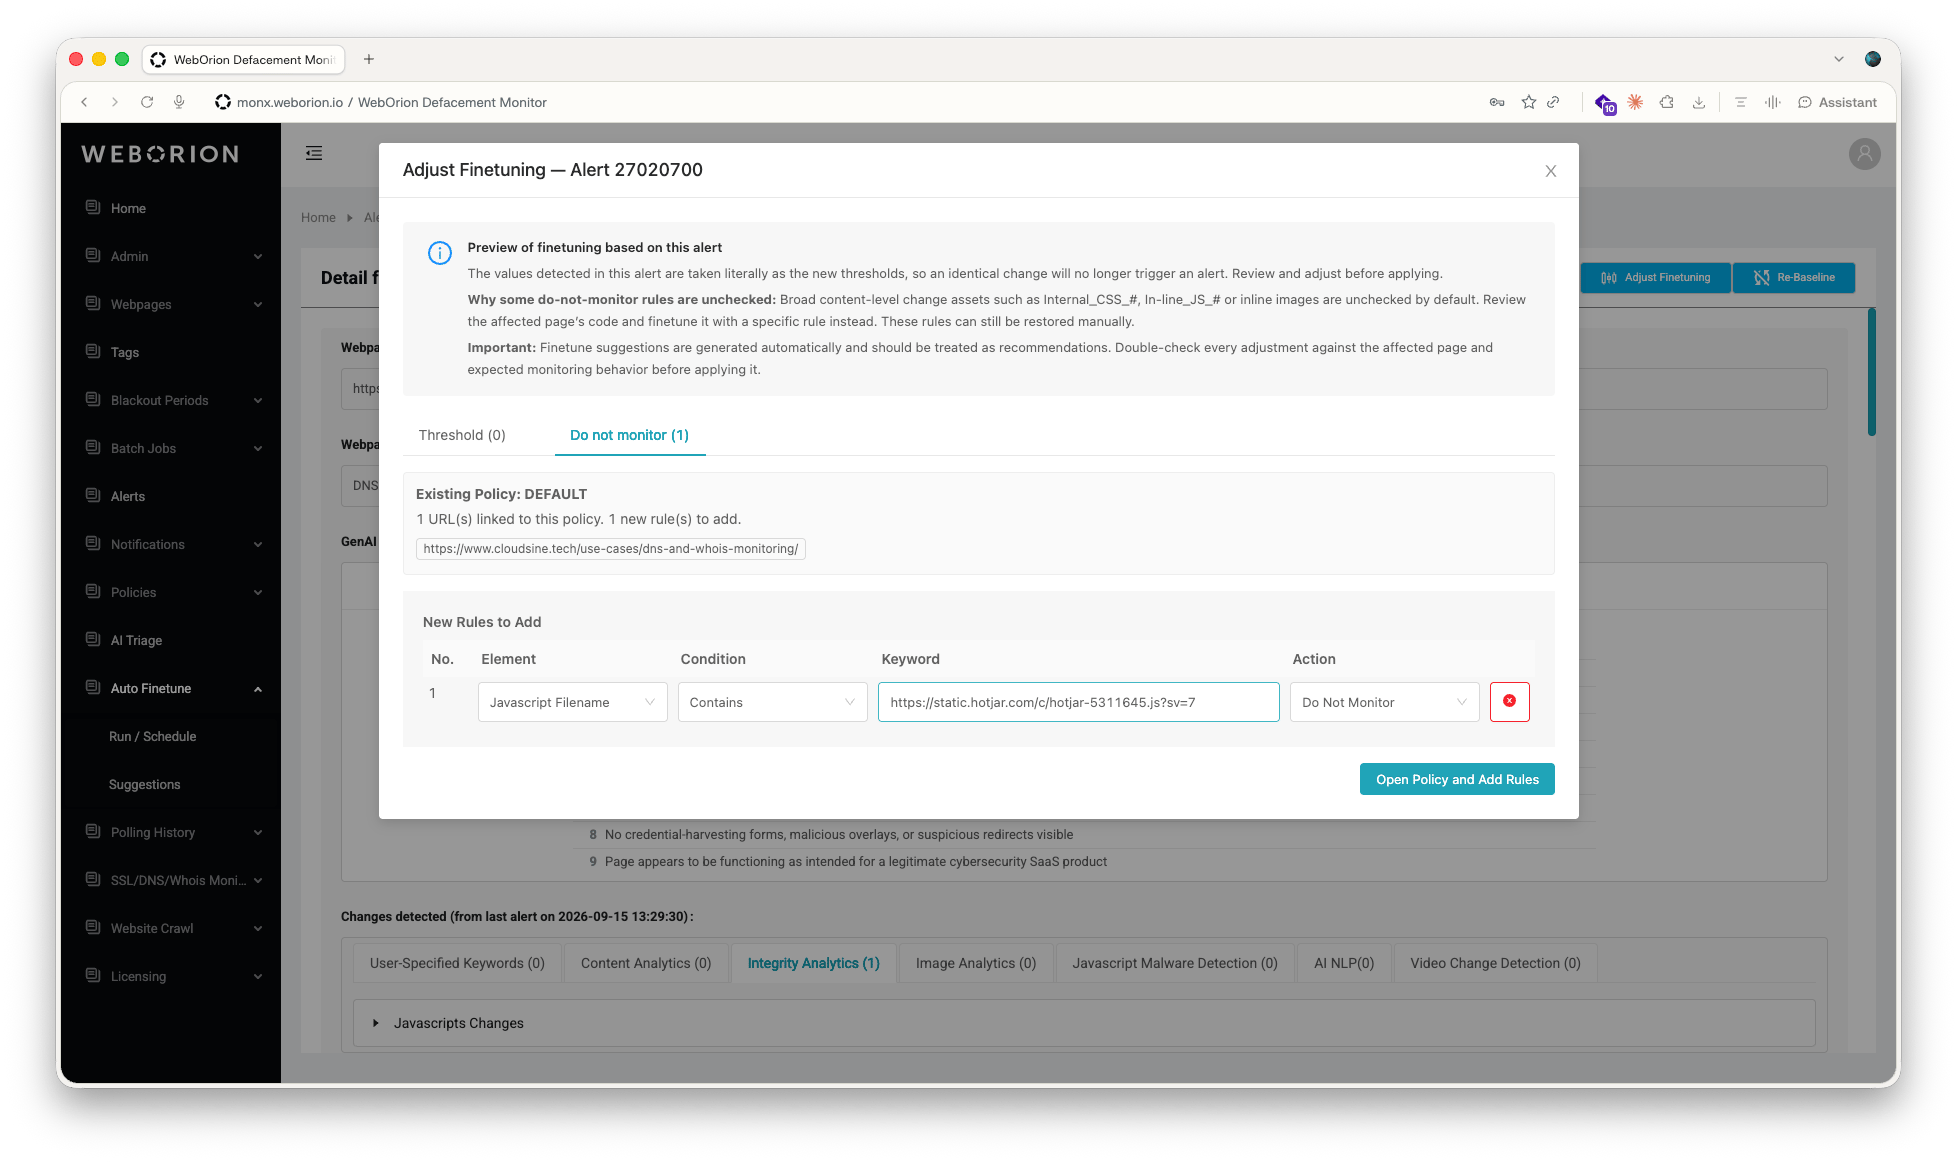
- Go to Alerts and open the alert.
- Click Adjust Finetuning.
- Threshold lists the element counts that changed. The Alert Value, the change detected in this alert, is used as the New Threshold, so an identical change no longer triggers an alert. Select the rows to apply and click Apply N threshold(s). The Apply to related URLs panel works the same way as in a report.
- Do not monitor lists the integrity elements that changed, as rules for the webpage’s policy or for a new policy. Review the rules, then click Open Policy and Add Rules or Create Policy with Suggested Rules.